Sunday, September 16, 2012

Renoir's Red Hat : Prezi

Renoir's Red Hat is a whimsical poem about a kid who goes to the art museum to steal some art (be it literal or figurative is up to the reader).

Each time our little thief fills a pocket, another artist is identified.  This story will help kids learn to recognize artists and their work through playful yet effective visual clues.


Top 5 Stop Motion Animations

If you have ever tried to create even the shortest of stop motion animations, you know how incredibly time consuming this art form can be. Still, it is easy to get lost in the story line of a good stop motion animation and forget about the time staking work that went into its creation. However, having the viewer mesmerized by the story line is the aim of stop motion, or any video for that matter.

Listed here are five of my favorite all time stop motion animations. I share these with not only my Computer Art & Animation class but with all of my classes including Art One and Art History.

So that my students gain an understanding and appreciation for the work that went into each of these videos, I often play the "making of" video as well. Below each video, I've also included a link to the "making of" video (where available).


Top 5 Stop Motion Animations I share with my High School Art Classes


#5. Cardboard Animation
by Sjors Vervoort


This animation created by Dutch based artist Sjors Vervoort brings monsters to life on the street. The characters are painted onto cardboard and filmed interacting in a real life environment.

I couldn't find a making of video so here is a link to Sjors Vervoort website


-----------------------


#4. Light Warfare
by Freddie Wong and Brandon Laatsch


I'm a big fan of drawing with light. Freddie Wong and Brandon Laatsch team used slow shutter speeds and lights to create this campy, yet entertaining street battle.

Here is a link to the Behind the Scenes of Light Warfare

-----------------------

#3. In Your Arms
By Kina Grannis
Directed by Greg Jardin
Produced by Daphne Raves
Concept Art by Lauren Gregg


What would you do with 22 months, 1,357 hours, 1 still camera and 288,000 jelly beans? Create a stop motion video for Kina Grannis, of course! The background of each scene is created entirely out of jelly beans but you still get lost in the story.

This is a much watch video of the Making Of In Your Arms

-----------------------

#2. Strawberry Swing
By Coldplay
Art by Shynola


This incredible stop motion video was created on the street using chalk by a group of friends who met in art school. Shynola, their team name, asked the actor Chris Martin to balance on a skateboard in order to save a princess from an evil squirrel. Meanwhile, they created chalk drawing after chalk drawing.

No video but here is an Interview with Shynola 

-----------------------

#1. Art History : Beginning to End
by Apex HS Art


OK, maybe I'm bias but this class did a great job creating this stop motion video. The video was created over the span of the semester. Though it appears to be a sped up video, it is actually thousands of single photographs put together.


Friday, September 14, 2012

RENOIR’S RED HAT

Renoir's Red Hat is a whimsical poem about a kid who goes to the art museum to steal some art (be it literal or figurative is up to the reader).

Each time our little thief fills a pocket, another artist is identified. This story will help kids learn to recognize artists and their work through playful yet effective visual clues.


Now on Prezi!


RENOIR’S RED HAT
A poem about Art History


What makes a happy heart
Is seeing modern art 
The museum’s where I start
To put art in my pocket
I put art in my pocket


Renoir and his red hats
Those hats are always red
They won’t fit in my pocket so
I put them on my head


From a bench I sat
And stared at Pollock’s splats
He splattered out of vats
I put splats in my pocket
Pollock splats in my pocket


Pollock and his splats
Renoir and his red hats
Those hats are always red
I put them on my head


Next I see Seurat
He painted little dots
I like those dots a lot 
I put dots in my pocket
Seurat dots in my pocket


Seurat who painted dots
Pollock and his splats
Renoir and his red hats
Those hats are always red
I put them on my head


Kandinsky looks like candy
Candy would be dandy
I’d like some dandy candy
I put them in my pocket
Kandinsky in my pocket


Kandinsky looks like candy
Seurat who painted dots
Pollock and his splats
Renoir and his red hats
Those hats are always red
I put them on my head


I also like Keith Haring
I find his line so daring
Wait till the guard’s not glaring
Then put them in my pocket
Keith Haring in my pocket


Haring’s daring line
Kandinsky looks like candy
Seurat who painted dots
Pollock and his splats
Renoir and his red hats
Those hats are always red
I put them on my head


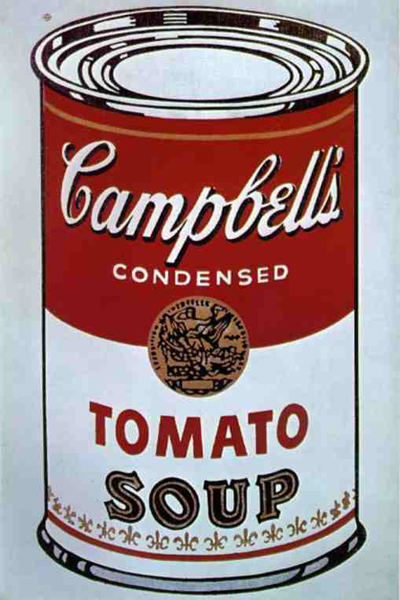
Warhol copied soup cans
Campbells is the name brand
Using only one hand
I put them in my pocket
Warhol in my pocket


Warhol’s copied cans
Haring’s daring line
Kandinsky looks like candy
Seurat who painted dots
Pollock and his splats
Renoir and his red hats
Those hats are always red
I put them on my head


Van Gogh made Starry Night
A Swirly whirly site
Makes me think I might
Put it in my pocket
Van Gogh into my pocket


Van Gogh’s painted swirls
Warhol’s copied cans
Haring’s daring line
Kandinsky looks like candy
Seurat who painted dots
Pollock and his splats
Renoir and his red hats
Those hats are always red
I put them on my head


-------------


Now it’s time to go
This is how I know
My pants are hanging low
There’s no room in my pocket

I’m almost down the block
That’s when I hear the cop
He hollers at me STOP!
He knows about my pockets
The art that’s in my pockets

Run!

Down the street I dart
My pockets full of art
I lose some from the start

Seruat falls out my pocket
Van Gogh falls out my pocket

I turn the corner fast
Can tell I’m running past
Not sure the art will last
Pollock leaves my pocket
Kandinsky out my pocket

I hear my heart go pound
It’s making a loud sound
I fall and hit the ground
Haring out my pocket
Warhol out my pocket

And looking up I see
The guard stands over me
And says to me with glee

I think you dropped your hat

Those hats are always red
I put it on my head
I put it on my head


by Ian Sands

Wednesday, September 12, 2012

Creating Art with Shadows


A Lesson Plan in Shadow Art

If you’ve never seen the shadow art of Tim Noble and Sue Webster you’re missing out. They literally shine light onto piles of junk and produce shadow images of people. You can check out their website here but do it from home and not the classroom. There are a few inappropriate words and images.
Meanwhile, if you are like me (and most art teachers) you already have a box of junk in your classroom. I have used mine box of junk by having the students create Rube Goldberg contraptions. The sculpture teacher at our school uses the box for recycled art projects. After viewing Tim and Sue’s work, I knew exactly what i wanted to do with that junk... Have my students create shadow art.

There really is little planning that can be done with such a project. It’s isn’t like other art projects where you can search for references or create sketches. You literally need to get your hands on the junk, hold it up to a light source and see what shadows form.

To acquire enough light sources that I could afford, I had to think a little outside the box. LCD projectors would be perfect but they are expensive. then it hit me. Our media center was storing a bunch of old slide projectors that nobody was using. When I inquired about checking them out, they asked me if i wanted them. They were happy for me to take them off their hands.

To start the lesson, I introduced my students to several shadow artists through a Powerpoint presentation. I showed the work of Tim Noble and Sue Webster as well as Kumi Yamashita and street artist Ellis Gallagher. Then I explained the project.

I explained to my students that they would be working in teams, manipulating junk to create shadow art on the wall. I left everything else... what they wanted to create, the theme of their art, even where they would project the light... up to them. 

They had one class period, 90 minutes, to accomplish their task. I kept them up to speed on the amount of time left in class so they wouldn’t finish to early not not finish in time.

The interesting thing about this type of project is there is no actual project. It is solely up to the photographer to capture the moment. At the end of class, the projectors would be put away, the piles of trash disassembled, and the box refilled with junk.


Tuesday, September 11, 2012

My Three Favorite iPad Apps for Art Teachers

There are many wonderful (and some not so wonder) drawing/painting apps available for the iPad. Some are easy to use while others are more complicated. Knowing which to painting app may be right for you can take some research.

Below is a look at my top three painting apps for the iPad. Two of these I currently teach to my students at Apex High School. I'm listing these in order from simplest to use to most complex.


I love this silly little app! It's like opening the draw at home where you keep all the art supplies and finding to your surprise that someone has actually organized it.

On the complexity scale it is relatively easy while still having some really great features. You start out by choosing a type of paper. These come in several different textures. You can also easily change the color. The default is white but here I have changed it to bue.

Speaking of color, that's the next thing you do. Click the little palette icon on the bottom left hand corner and select from a wide range of colors.

Lastly, choose your medium.. crayon, marker, pen, paint, colored pencil. They all respond similarly to what you would expect. 

Art Set is about as simple as that. However, I think that the simplicity is what gives Art Set its charm. Most anyone from small children to adults will be able to instantly create art. For the low, low price of 99 cents, it's worth the download.


If you're looking for something a little more advanced, but still easy to us, try Layers. What I like about layers is how simple it is. It has a brush, an eraser and a smudgy finger. That and of course, layers.

The version I'm using only allows for four layers but that is a good number when you are just starting out. Layers has a better set of brush styles than Art Set but not so many that you can't decide what to use. The brushes are adjustable, again just enough to get started without complicating life.

The best feature by far is Layers smudge tool. It just seems to work better than smudge tools on other apps. You can adjust the brush size and pressure as well.


Sketchbook Pro is one of two apps I've already purchased for my art classes at Apex High School. One of the nice features that many drawing apps come with is layers (layers as a tool not to be confused with Layers the App). Layers, which are transparent, allow the artists to draw or paint on top of of drawings. For example, you can put a line sketch on a bottom layer and then paint in color on a top layer. The beauty of layers is, they can be turned on or off while the artist is working. Layers can also moved above or below a layer. Sketchbook Pro also also four different layer modes including multiply, add and screen. you can even adjust the opacity of the layers. you can see how much more rich and complex this app is already.

 Another really nice feature of Sketchbook Pro is all the different brushes it comes with. In the image above you can see the 8 little grey icons. These represent some of the different brushes available. I can swipe that menu and reveal more brushes. Plus I'm pretty sure I can add more brushes (though I haven't tried that yet). Sketchbook Pro also allows me to adjust the opacity of the tool I'm using. This way I can spray colors on top of colors.

Sketchbook Pro even comes with a bunch of goofy stamps... clouds, little people, bugs and butterflies.. a little corny and canned but they are fun to play with. Plus, I'm pretty sure, like custom brushes, that I can create my own stamps.  

There are a lot of other exciting options that I haven't mentioned.. like the transform tool that lets you rotate and resize your image. Or the symmetry tool that mirrors on the right everything you draw on the left. Want to draw a butterfly with perfectly symmetrical wings? This tool is the trick. Sketchbook pro also provides a full range of image sending options... email it, post to Twitter or Facebook, etc...

If your just looking for something fun and easy to use, I'd recommend you Art Set. If you are looking for something a little more grown up but still easy to use, give Layers a whirl. If you're looking for a big-boy (or girl) drawing app, Sketchbook Pro is complex enough to do some serious damage.


Monday, September 10, 2012

IPad Art Apps and Homeschools


Let’s Make Art On The iPad : 

Kids love to make art. Nothing is more exciting for parents than watching their child tear into a box of crayons. It’s wonderful to participate in the engaging explanation of what they are creating. Art projects are exciting, creative and fun but they can also be messy to clean up and supplies can be costly. If you are currently using an iPad as an educational tool, you already understand the benefits of using it as a teaching tool. These five reasons will motivate you to migrating your art projects there as well.

1. Easy to learn:

As a computer arts instructor, I teach professional graphics applications.  These programs are complicated, they can take years to master. Art apps on the iPad are the complete opposite. You don’t need to be a tech guru to understand how they work. They are intuitive and your students can start making art from the first drag of their finger. 

2. Inexpensive:

Besides being easer to use, iPad apps sell for a fraction of the cost of professional computer graphic applications. Instead of hundreds or even thousands of dollars, most iPad apps retail for seven dollars or less. In fact, most apps have a lite version which will be considerably cheaper, sometimes free. 


iPad apps can also be a cost saving substitute for more expensive materials. While the iPad shouldn’t replace all art supplies, there are techniques you can create using an iPad that would be expensive to purchase if created using traditional supplies. For example, it would cost several hundred dollars to purchase an airbrush, while most iPad art apps have an airbrush effect.

3. Erasing is easy:

With the exception of a pencil an eraser, no media is easier to make changes in than digital art. all art apps have some sort of undo button. With most you can back up several steps, erasing the last five or so paint stokes you created. Try that with crayons or tempera paint.

4. Clean up is a breeze!

Cleaning up after painting means cleaning brushes, dumping water, wiping up spills and putting away bottles of paint. cleaning up after painting on an iPad means clicking a button. Click once to save your creation, click again to close the app. An added benefit is the ease of mind knowing you’ll never ruin the carpet by spilling iPad paint. Go ahead, paint in the living room.


5. Storage is simple:

There is only so much room on the fridge for showcasing art and only so much attic space for storing older art. With iPad apps, you can save everything electronically and still print the best ones to hang on the fridge. Sharing is also a breeze as most apps have “one-click email” and “post to Facebook” options. Create a digital portfolio online and save more attic space for those boxes of holiday decorations. 


If you are totally new to world of digital painting, selecting the right app can be overwhelming at first. Look for apps that have free versions. If you like the app, you can always upgrade to the full version later. 

Coming soon: three of my Favorite iPad Art Apps!


How to Create A Post-it Note Mural


The one project by far that I receive the most requests asking, "How'd you do that?" is the Post It Note Mural. 

In this lesson you will find images and a description of the process we used to complete these projects. There is also a link to a video that demonstrates the process.

I just made the entire process available for free! 


Later we used the same process for turning Bricks into Pixels and also to complete portraits using Skittles. We even created a huge mosaic of the Mona Lisa using over 2,000 balloons!


No matter what the media, the basic concept is the same. Start by creating an image map that uses the same colors as the object (Post-it Notes, balloons, Skittles, etc) that you will use to complete your mural.

This step by step instruction will walk you through the entire process.

Download the entire process for FREE in PDF format! 


post it note art

Learn how to create this Johnny Depp Post_it Note Mural


Below:
It took us 16,000 Post-it Notes to complete the ten murals created at Apex High School. Here are five of the murals...


post it note mural

Steve Carell

post it note mural

Marilyn Monroe


post it note portrait

John Lennon


post it notes

Audrey Hepburn

  post it note portrait

Leo Dicaprio

-----------------------

I've just posted two other lesson plans!


How to Create Light Graffiti


This project merges technology with stencils and the concept of positive and negative space into one fun and effective lesson. Students will learn how to easily manipulate photos to make stencils to create cool light graffiti images using glow sticks and digital cameras!

Light graffiti is just a starting point. This lesson could easily be modified to create stencils for lesson using spray paint or even printing techniques.

This plan includes step-by-step, easy to follow instructions with lots of photographs demonstrating exactly how you class can create awesome light graffiti art! 


-----------


How to Create 3D Anamorphosis Drawings!

This project merges technology with traditional drawing and the concept of perspective into one fun and effective lesson. Students will learn how to easily manipulate photos of common day objects so they can be used as references for 3D anamorphosis drawings

3D drawings are just a starting point. This lesson could easily be modified to create references for street art chalk festivals similar to those works created by Julian Beaver.

This plan includes step-by-step, easy to follow, illustrated instructions as well as methods for periodically testing mid project to ensure success.


Sunday, September 02, 2012